git commands, clone = checkout git stash, git commit, git push, git pull, and Djnago common used commands in deployment
When you start committing projects, merge to apply trunk in all branches so that it continues with additional functionalities that should come in all versions. Test your code first to make sure there are no errors that you would unexpectedly apply in deployment. Start trunk in development, separately with development database and config.
When you start committing.
git status
This command shows you what has already been changed since the last commit.
git add
With "git add" comand you can add files in commit to push it to the server.
git add *
Some people do everything in commit but I don't recommend it because several unnecessary files can get into commit so it might work better with one behind the other files.
For example
git add crawler/management/commands/adzunaxml.py crawler/management/commands
Now you comit your changes with a comment so that with the next command you can push all changes.
git commit
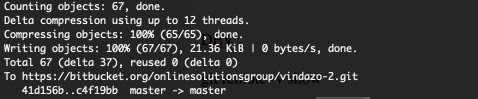
git push
Successfully push in trunk?
Then you can go to the next step and marge trunk with development branche
To make clear that we always have trunk it is never installed anywhere you can run it separately but trunk is a central code base that is central in all branches.. Then each branch may have its own version differences which is usually needed for different countries and different languages because not only translation is important in some countries customers and customer requirements are completely different and there are differences that's why we make a separate branche for each country.
Trunk would be the main body of development, originating from the start of the project until the present. Branch will be a copy of code derived from a certain point in the trunk that is used for applying major changes to the code while preserving the integrity of the code in the trunk.

So in this way if we change something that has yet to be applied in all versions. Then we do that in trunk / master, then we commit it to trunk / master.. Then we read it in development branch of a certain country, test, and make database changes, translations etc. in developlent.. When everything is ready and everything tested then we put it in development and update the deployment version. In this way we ensure that the wrong version of a site is never set up or mixed.
In development version of a certain branch
DEV
git remote -v show
git pull upstream master ( marge trunk with confilcts )
grep -r "<<<<<<< HEAD"
In most of conflicts head should be.. For ads
git commit
git push
DEP
In deployment can you then pull changes marged with trunk.
git pull ( branche in deployment )
git pull origin master
Yet another example that often could occur.
Git stash
git stash = local copy save and return to head.
# ... hack hack hack ...
$ git stash
$ edit emergency fix
$ git commit -a -m "Fix in a hurry"
$ git stash pop
# ... continue hacking ...
Only if you need to download something first.
Git restore
If you haven't already initiated the deletion process, you can simply execute `git restore <filename>`, and the file will be recovered from the index. However, if you have already staged the changes, running `git restore` will result in an error because the file no longer exists in the index.
deleted: vehicles/templates/cars_list.py
git restore vehicles/templates/cars_list.py
Checking Out with Git:
In the world of version control systems, Git is a powerful tool that allows developers to manage and track changes in their projects efficiently. One of the fundamental commands in Git is `checkout`. This command serves various purposes, making it an essential part of any developer's toolkit.
The primary function of `git checkout` is to switch between different branches in a Git repository. This is particularly useful when working on collaborative projects or managing different features or bug fixes simultaneously. You can effortlessly move from one branch to another using the command, ensuring that you are working on the correct codebase for your current task.
Here's a basic usage of `git checkout` to switch branches:
```shell
git checkout <branch_name>
```
Additionally, `git checkout` can be used to:
1. Create a New Branch: You can create a new branch and switch to it in a single command.
```shell
git checkout -b <new_branch_name>
```
2. Revert Changes: If you want to discard changes made to a specific file, you can use `git checkout` to restore the file to its last committed state.
```shell
git checkout <filename>
```
3. Checkout Specific Commit: You can also use `git checkout` to examine the state of your project at a particular commit.
```shell
git checkout <commit_hash>
```
Now, let's shift our focus to Django projects and the number of commands needed to compile translations and modify the database.
Git toevoegen aan een bestaand project en committen
Om Git toe te voegen aan een bestaand project en je wijzigingen te committen, volg je de volgende stappen:
1. Open een terminal (of command prompt)
Ga naar de directory van je project via de terminal. Gebruik het cd-commando om naar je projectmap te navigeren. Bijvoorbeeld:
cd /pad/naar/je/project2. Git initialiseren in het project
Voer het volgende commando uit om een nieuwe Git-repository te initialiseren:
git initDit maakt een verborgen .git-map aan in je project, waar Git zijn informatie opslaat.
3. Voeg de bestanden toe aan de Git-staging area
Gebruik het volgende commando om alle bestanden in je project aan de staging area toe te voegen (zodat ze klaar zijn om gecommit te worden):
git add .De . staat voor "alle bestanden". Je kunt ook specifieke bestanden toevoegen door hun pad te specificeren, bijvoorbeeld git add bestandsnaam.ext.
4. Maak een commit met een beschrijvende boodschap
Voer het volgende commando uit om je wijzigingen op te slaan in Git met een beschrijvende boodschap:
git commit -m "Beschrijving van je commit"Vervang "Beschrijving van je commit" door een korte uitleg van wat je hebt toegevoegd of veranderd, zoals "Eerste commit".
5. (Optioneel) Verbinden met een externe Git-repository (bijv. GitHub)
Als je je project naar een externe repository wilt pushen, verbind je het lokale project met een externe repository:
- Maak een repository aan op een platform zoals GitHub (of Bitbucket, GitLab, etc.).
- Voeg de externe repository toe als een
remotein je lokale Git-repository: - Push je wijzigingen naar de externe repository:
git remote add origin https://github.com/gebruiker/repositorynaam.gitgit push -u origin masterDit stuurt je lokale wijzigingen naar de master-branch van de externe repository. Afhankelijk van je Git-versie kan de hoofdbranch ook main heten, in dat geval zou je master moeten vervangen door main.
Samenvatting van de commando's
cd /pad/naar/je/project
git init
git add .
git commit -m "Eerste commit"
git remote add origin https://github.com/gebruiker/repositorynaam.git  # Alleen als je met een remote werkt
git pull origin main --allow-unrelated-histories --no-rebase
git push -u origin master  # Alleen als je met een remote werkt
Nu is je project ingesteld met Git en klaar om wijzigingen bij te houden!
Samenvatting van de Oplossing voor Git Merge Conflict
De volgende stappen zijn uitgevoerd om het merge-conflict in de .gitignore op te lossen en de wijzigingen succesvol naar de remote repository te pushen:
- Pull de wijzigingen van de remote branch met de optie
--allow-unrelated-historiesen zonder rebase: - Probeer vervolgens te pushen naar de remote repository:
- Los het conflict op in
.gitignoredoor het bestand te bewerken: - Voeg het bestand toe aan de staging area na het oplossen van het conflict:
- Commit de wijzigingen met een beschrijvende commit boodschap:
- Push de commit naar de remote repository:
git pull origin main --allow-unrelated-histories --no-rebasegit push origin mainvim .gitignoregit add .gitignoregit commit -m "ignor fixed"git push origin mainNa het uitvoeren van deze stappen werd het merge-conflict succesvol opgelost en zijn de wijzigingen naar de remote branch gepusht.
Comments
Post a Comment