
1. Go to the Google Play Developer Console website:
- Open your web browser and visit the Google Play Developer Console signup page: [https://play.google.com/apps/publish/signup/](https://play.google.com/apps/publish/signup/).
2. Sign up for an account:
- Click on the "Create account" button to start the signup process.
- You'll be prompted to sign in with your existing Google account or create a new one. If you don't have a Google account, you'll need to create one.
3. Read and agree to the Google Play Developer distribution agreement:
- After signing in, you'll be presented with the Google Play Developer distribution agreement.
- Read through the agreement carefully, and if you agree with the terms, check the box to accept and continue.
4. Fill out your Google Play Developer Profile:
- Next, you'll need to provide some information for your Google Play Developer Profile.
- Fill in the required fields, including your developer name, email address, and phone number. You may also need to provide additional information depending on your location and the type of app you plan to publish.
- Review the information you entered and make sure it is accurate.
5. Complete the registration process:
- Once you have filled out your Google Play Developer Profile, click on the "Continue to Payment" button.
- On the payment screen, select your country and provide the required payment information. Note that there is a one-time registration fee of $25 USD to create a Google Play Developer Account. You can make the payment using a credit or debit card.
- After completing the payment process, your Google Play Developer Account will be created.
Congratulations! You have successfully created a Google Play Console account and set up your Google Play Developer Account. You can now proceed with publishing your apps on the Google Play Store by following the instructions provided in the Google Play Developer Console.
Next step is building your bundle
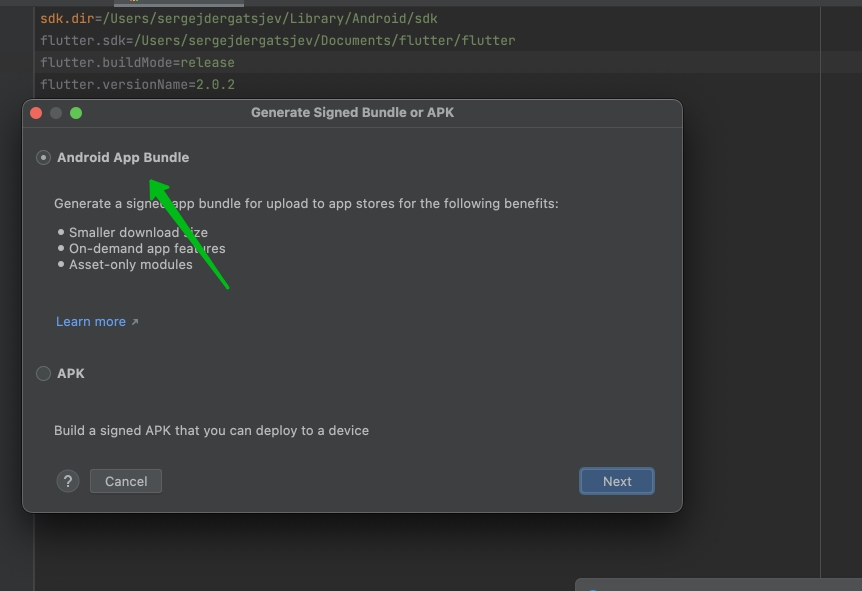
The APK or Android App Bundle you uploaded was signed in debug mode. To proceed, you must sign your APK or Android App Bundle in release mode.


Check version for publication
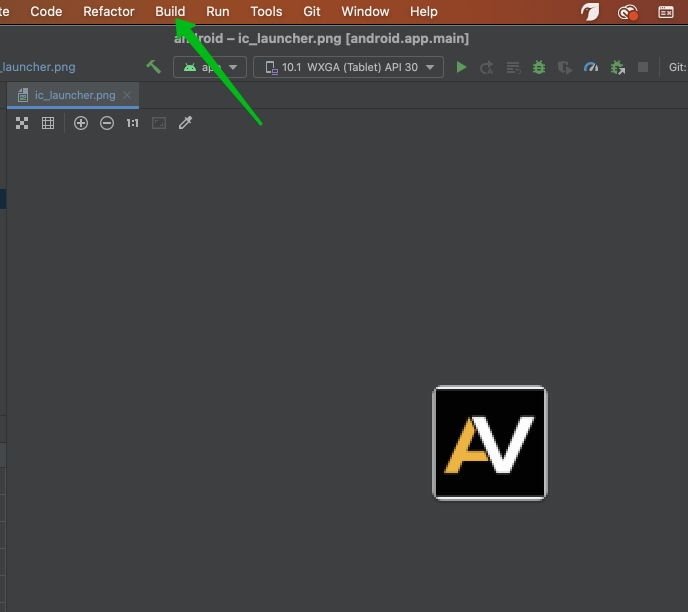
Generate Bundle
Search passwords in saved password manager or where you it saved first time or create a new keystore.
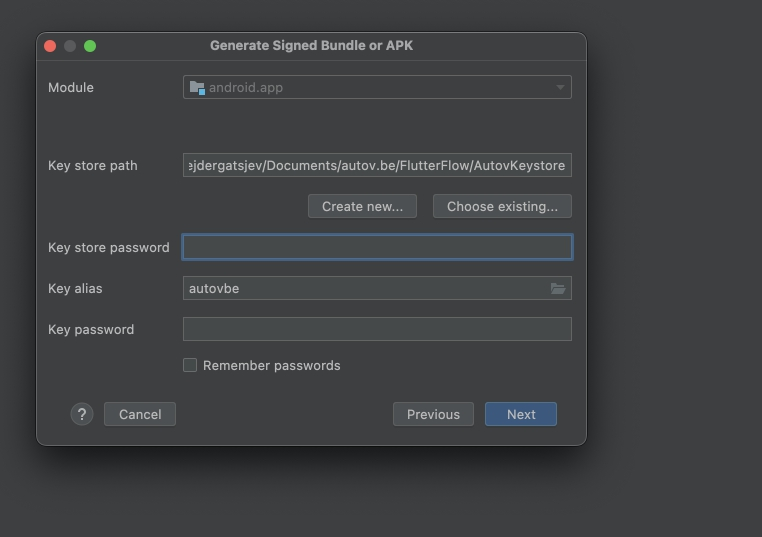
Remember password and select Release.
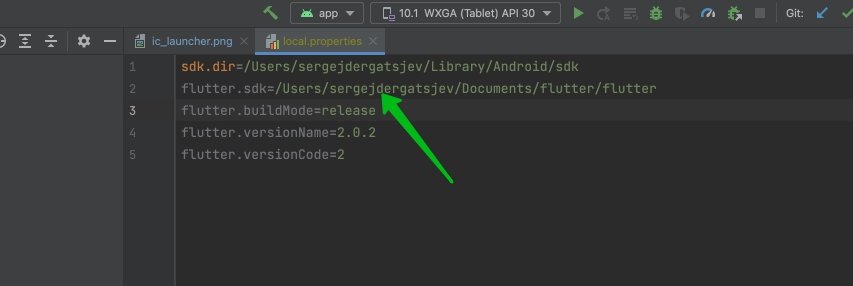
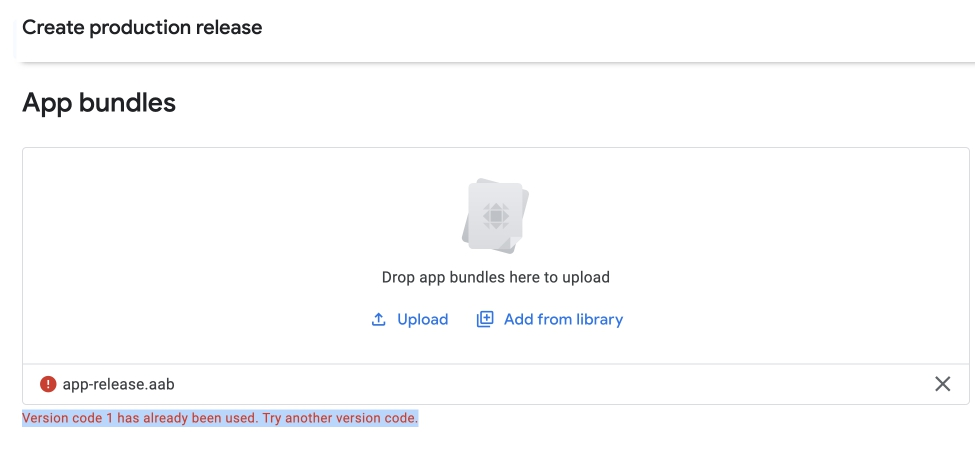
When you get error message. Check your version again in local.proporties file.
Version code 1 has already been used. Try another version code.
vim android/local.properties
Create your first app


Use first link to download first test app.
Split-per-abi
Not immediately necessary, but could be useful.https://developer.android.com/tools/bundletool#generate_apks
flutter build apk --split-per-abi

https://developer.android.com/tools/bundletool#deploy_with_bundletool


vim android/local.properties
sdk.dir=/Users/sergejdergatsjev/Library/Android/sdk
flutter.sdk=/Users/sergejdergatsjev/Documents/flutter/flutter
flutter.buildMode=debug
flutter.versionName=1.0.0
flutter.versionCode=1
flutter.buildMode=debug
flutter.versionName=1.0.2
flutter.versionCode=2
How to Run Flutter App on Real Android Phone Device

1. Connect your Android device to your computer using a USB cable.
2. Enable Developer Mode on your Android device. To do this, go to "Settings" > "About phone" (or a similar option) and tap on the "Build number" seven times. This will enable Developer Mode on your device.
3. Enable USB Debugging on your Android device. Go to "Settings" > "Developer options" (or a similar option) and enable "USB debugging." IN development options

4. Open your Flutter project in a code editor or IDE (Integrated Development Environment) such as Visual Studio Code or Android Studio.
5. Ensure that your Flutter SDK is correctly installed and configured. You can verify this by running the command `flutter doctor` in your terminal or command prompt. It will check for any missing dependencies or configuration issues.
6. Once you've verified that your Flutter project is set up correctly, open a terminal or command prompt and navigate to your project's root directory.
7. Connect your Android device to your computer using the USB cable, and make sure it is detected by running the command `flutter devices`. You should see your device listed as a connected device.

8. To run the Flutter app on your Android device, use the command `flutter run`. This will compile the app and install it on your connected device.
9. Wait for the app to build and install on your device. You should see the app launch automatically once the installation is complete.
10. If you encounter any issues or errors during the process, check the error messages in the terminal or command prompt for troubleshooting. You may need to install additional packages or resolve any missing dependencies.
That's it! Your Flutter app should now be running on your real Android device. You can interact with the app directly on your device and test its functionality.
Google Play app designing its icons

The Google Play icon has gone through several iterations over the years, reflecting Google's evolving design principles. The current design features a triangle-shaped icon, known as the Google Play "Play" button, with vibrant colors and a white outline. The triangle represents a play symbol commonly associated with media playback.
The design of the Google Play icon aims to be visually appealing, distinctive, and easily identifiable. It follows Google's Material Design guidelines, which emphasize simplicity, clarity, and consistency across their products and platforms. The use of bold colors and geometric shapes helps the Google Play icon stand out on various device screens and app interfaces.
As an essential element of the Android ecosystem, the Google Play icon is present on millions of devices worldwide. Its design ensures a cohesive and intuitive user experience, as users can quickly locate and access the Google Play Store to discover, download, and update applications, games, movies, books, and other digital content.
Overall, the Google Play icon design represents Google's commitment to creating visually engaging and user-friendly experiences within the Android ecosystem, while maintaining brand consistency and recognition.
To create custom icons, such as your app launcher icon, it is recommended to utilize Image Asset Studio. When dealing with launcher icons in particular, the AndroidManifest.xml file should include a reference to the location "mipmap/". Image Asset Studio conveniently generates the necessary code for this. The code snippet below demonstrates how the manifest file refers to the ic_launcher icon located in the mipmap/ directory.


1. It aims to entice visitors to play and watch your promotional video.
2. It aims to effectively communicate your app's value proposition.
Achieving both objectives with a single graphic is challenging, especially considering that accomplishing this task with multiple screenshots is already difficult.
In short, the solution lies in a combination of compelling visuals, which include branding elements, and, in many cases, persuasive copy. To delve into further details and explore examples, please continue reading.
Additionally, it's important to consider that if you have put in considerable effort to be featured by Google, it is crucial to encourage individuals who come across your feature graphic to give your app a try.

How to Run a Flutter App on an Android Device
To run a Flutter app on an Android device, you'll need to follow these steps:
- Install Flutter and Dart: If you haven't already, you'll need to install Flutter and Dart on your development machine. You can follow the instructions on the official Flutter website for your specific operating system: Flutter Installation Guide
- Set Up Android Studio or Visual Studio Code: You can use either Android Studio or Visual Studio Code as your development environment for Flutter. Both are popular choices, and you can install Flutter and Dart plugins for either of them.
- Enable Developer Options on Your Android Device: On your Android device, go to the Settings app, find the "About phone" section, and tap on the "Build number" multiple times (usually 7 times) until it says you're a developer. This will enable developer options on your device.
- Enable USB Debugging: In the developer options on your Android device, enable "USB debugging." This allows your device to communicate with your development environment.
- Connect Your Android Device to Your Computer: Use a USB cable to connect your Android device to your computer.
- Verify Device Connection: Open a terminal or command prompt and run the following command to ensure your device is recognized:
This should list your connected Android device.flutter devices - Navigate to Your Flutter App's Directory: Open a terminal or command prompt and navigate to the directory where your Flutter app is located.
- Run the Flutter App: To run your Flutter app on your Android device, use the following command:
Flutter will build your app and install it on your connected Android device. You'll see the app launch on your device, and you can interact with it just like any other app.flutter run - Hot Reload (Optional): While developing, you can use the hot reload feature by making changes to your code, saving the file, and seeing the updates immediately on your device without restarting the app. This can significantly speed up development.
- Debugging (Optional): You can also debug your Flutter app by setting breakpoints in your code, inspecting variables, and using the debugging tools provided by your development environment.
That's it! Your Flutter app should now be running on your Android device, and you can start developing and testing it.
Comments
Post a Comment